


The Most Complex Drawing I've Ever Done
With over 100 layers, this piece was a unique challenge in planning and organization!

In early September, on the same day as I was finishing up the last of a series of illustrations for Kathy Groppe’s upcoming textbook, I received an email from Amy of Spring Hill Soil Laboratory in BC, Canada. I’d worked with Amy on her logo back in 2022, so it was exciting to hear from her again!
Amy and her friend Andrea (Pacific Composting) were getting ready for a family-oriented workshop at an upcoming community event, and they wanted a custom illustration of the soil food web. The artwork needed to be kid-friendly, but appealing to adults too, and drawn in a simple style while still being comprehensive and accurate enough to be used as a teaching tool during hands-on microscope sessions.
The workshop was only about two weeks away, but I agreed to give it a try.
We met over zoom and discussed the project in more detail. Once our initial plans were finalized and the commission agreement was established, I got to work.
As I started sketching to plan the overall composition, I began to realize I would need to take a more structured approach than usual for this project. We ended up with a list of around 38 different items to cover, which meant I would need to stay as organized as possible to make sure everything was accounted for and presented appropriately both ecologically and aesthetically.
About a week into the project we could see that the two week deadline was unrealistic for an illustration of this scope. It took us a week just to decide on the basic layout, so there was no possible way to do everything they were asking for in such a short time.
They gave me a shorter list of organisms to prioritize. I’d draw those first and send them as standalone images in time for the workshop, and then we could relax the timeline on the main drawing.
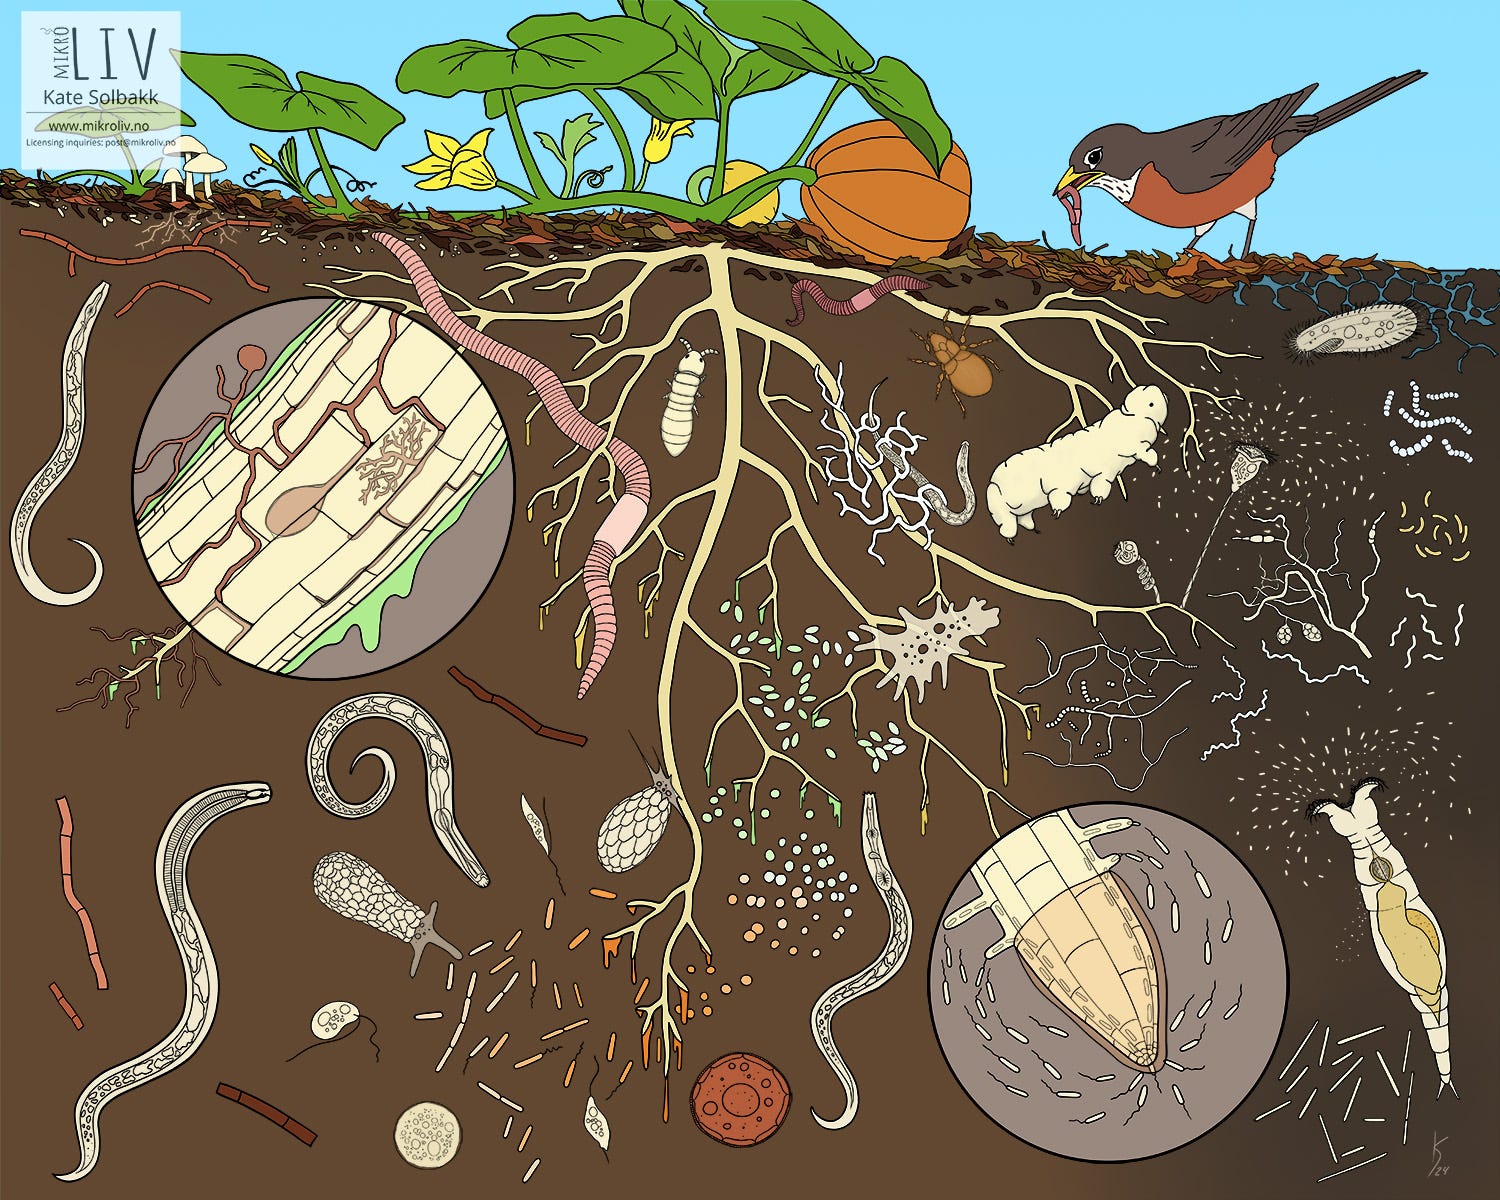
An Illustration of the Soil Food Web
This is intended to be a comprehensive overview of the soil food web for use in workshops where Amy and Andrea will teach participants about the soil ecosystem and how they assess soil in the microscope.
We decided not to add text, both to reduce clutter and to keep the drawing more versatile. They can always add any relevant labels, arrows, or other graphic elements later on if needed. The drawing could also be made into an activity sheet, for example by adding numbers next to each organism and a list of blank lines for participants to fill out as they learn who’s who. Lots of possibilities!
Simple Doesn’t Mean Easy
We decided on solid lines and flat colours to keep the drawing friendly and approachable for all ages. I kept shading to an absolute minimum to reduce the amount of information the viewer’s eyes have to take in, and to make sure there are enough spaces for them to “rest”. The big orange pumpkin and the circles with zoomed-in parts help create balance in the overall composition both with colours and shapes. They provide anchor points where your eyes can take little breaks from processing the busier areas.
This drawing style, while appearing simple, is actually very challenging to create. At least it is for me, because I’m used to drawing things realistically with lots of detail, so this is the complete opposite of how I normally work. In my usual work there are no hard outlines, and everything is done with blended colours and subtle shading.
With a simpler drawing style, every single mark on the page is significant and needs to be done with great care and precision.
Most microbes are translucent with little or no colour, and we’re used to seeing them against a bright background in the microscope. Here I had to show the microbes against a dark background while using solid colours. How do you choose just one colour to represent anything, let alone something that’s actually colourless? I must admit this part of the project made me grumpy for a week or two while trying to figure it all out. Everything I did felt wrong! I was moving far outside my comfort zone, with no intuition to tell me if I was on the right track.
I finally completed the colouring and reluctantly sent a progress update to Amy and Andrea for feedback. I went to bed that night fully expecting to have to redo everything once I got the reply.
I woke up to a super enthusiastic response from Amy. She absolutely loved it! Another email came shortly after from Andrea and she was just as excited. What a relief! Their enthusiasm gave me a huge boost and a great sense of accomplishment and fresh confidence. Growing skills can be a painful process, but so incredibly rewarding!
Extra Functionality = Extra Layers!
The complete project is much more than a single image. I made the final piece into a colouring page too, and provided the elements from the drawing separately for use in other contexts. I also made the final drawing into a series that can be used in presentations to explain trophic levels in the soil ecosystem, by adding pieces of the full picture bit by bit.
For all of this to be possible, I had to make sure I drew everything on separate layers. If you’re not familiar with how digital drawing works, imagine sheets of clear film like the ones teachers used with old projectors. Each layer is like a separate sheet of film you can draw on without affecting the layers stacked above or below.
So each part of the drawing has its own layer for the line art, and then another layer below so I could add colour without affecting the lines.
The list of layers grew so huge I had to start using folders and colour coding to keep track of it all. That was a first for me! I didn’t even know you could colour code Photoshop layers before this. Here’s a little video where you can see me scroll through the enormous list of layers. The colours correspond to groups of organisms, such as bacteria, protozoa, fungi, etc.
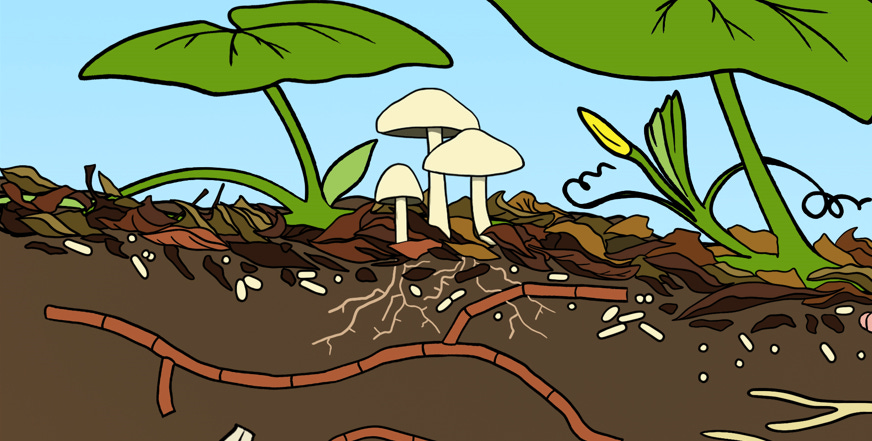
Standalone Line Drawings
For the standalone drawings, I thought it would be as simple as copying the line art over from the main drawing into a separate file, and exporting them from there. However, I didn’t consider that the individual parts of the drawing were relatively small. They looked nice in the main drawing, but they didn’t scale up well. The lines became fuzzy, and small imperfections became super obvious. I could scale up the main drawing, but it would need to be absurdly large for this to work well, so I had to come up with another solution.
I copied the drawings into new files and scaled them up as I originally planned, but then lowered the opacity and added a new layer on top, then traced over the original drawing. This allowed me to recreate the same drawing but with much cleaner, sharper lines. Since the “big” versions of the drawings looked so much better, I decided to copy those back into the main drawing and use them there as well.
That became the procedure for the whole illustration. I’d first sketch things out in the main drawing to work out the general shape and composition, then copy each sketch onto its own canvas at higher resolution, draw a clean version, and then copy it back.
Here are some examples of the standalone drawings. I quite like how these turned out and I think they’ll work very nicely for colouring and presentations and all sorts of things!


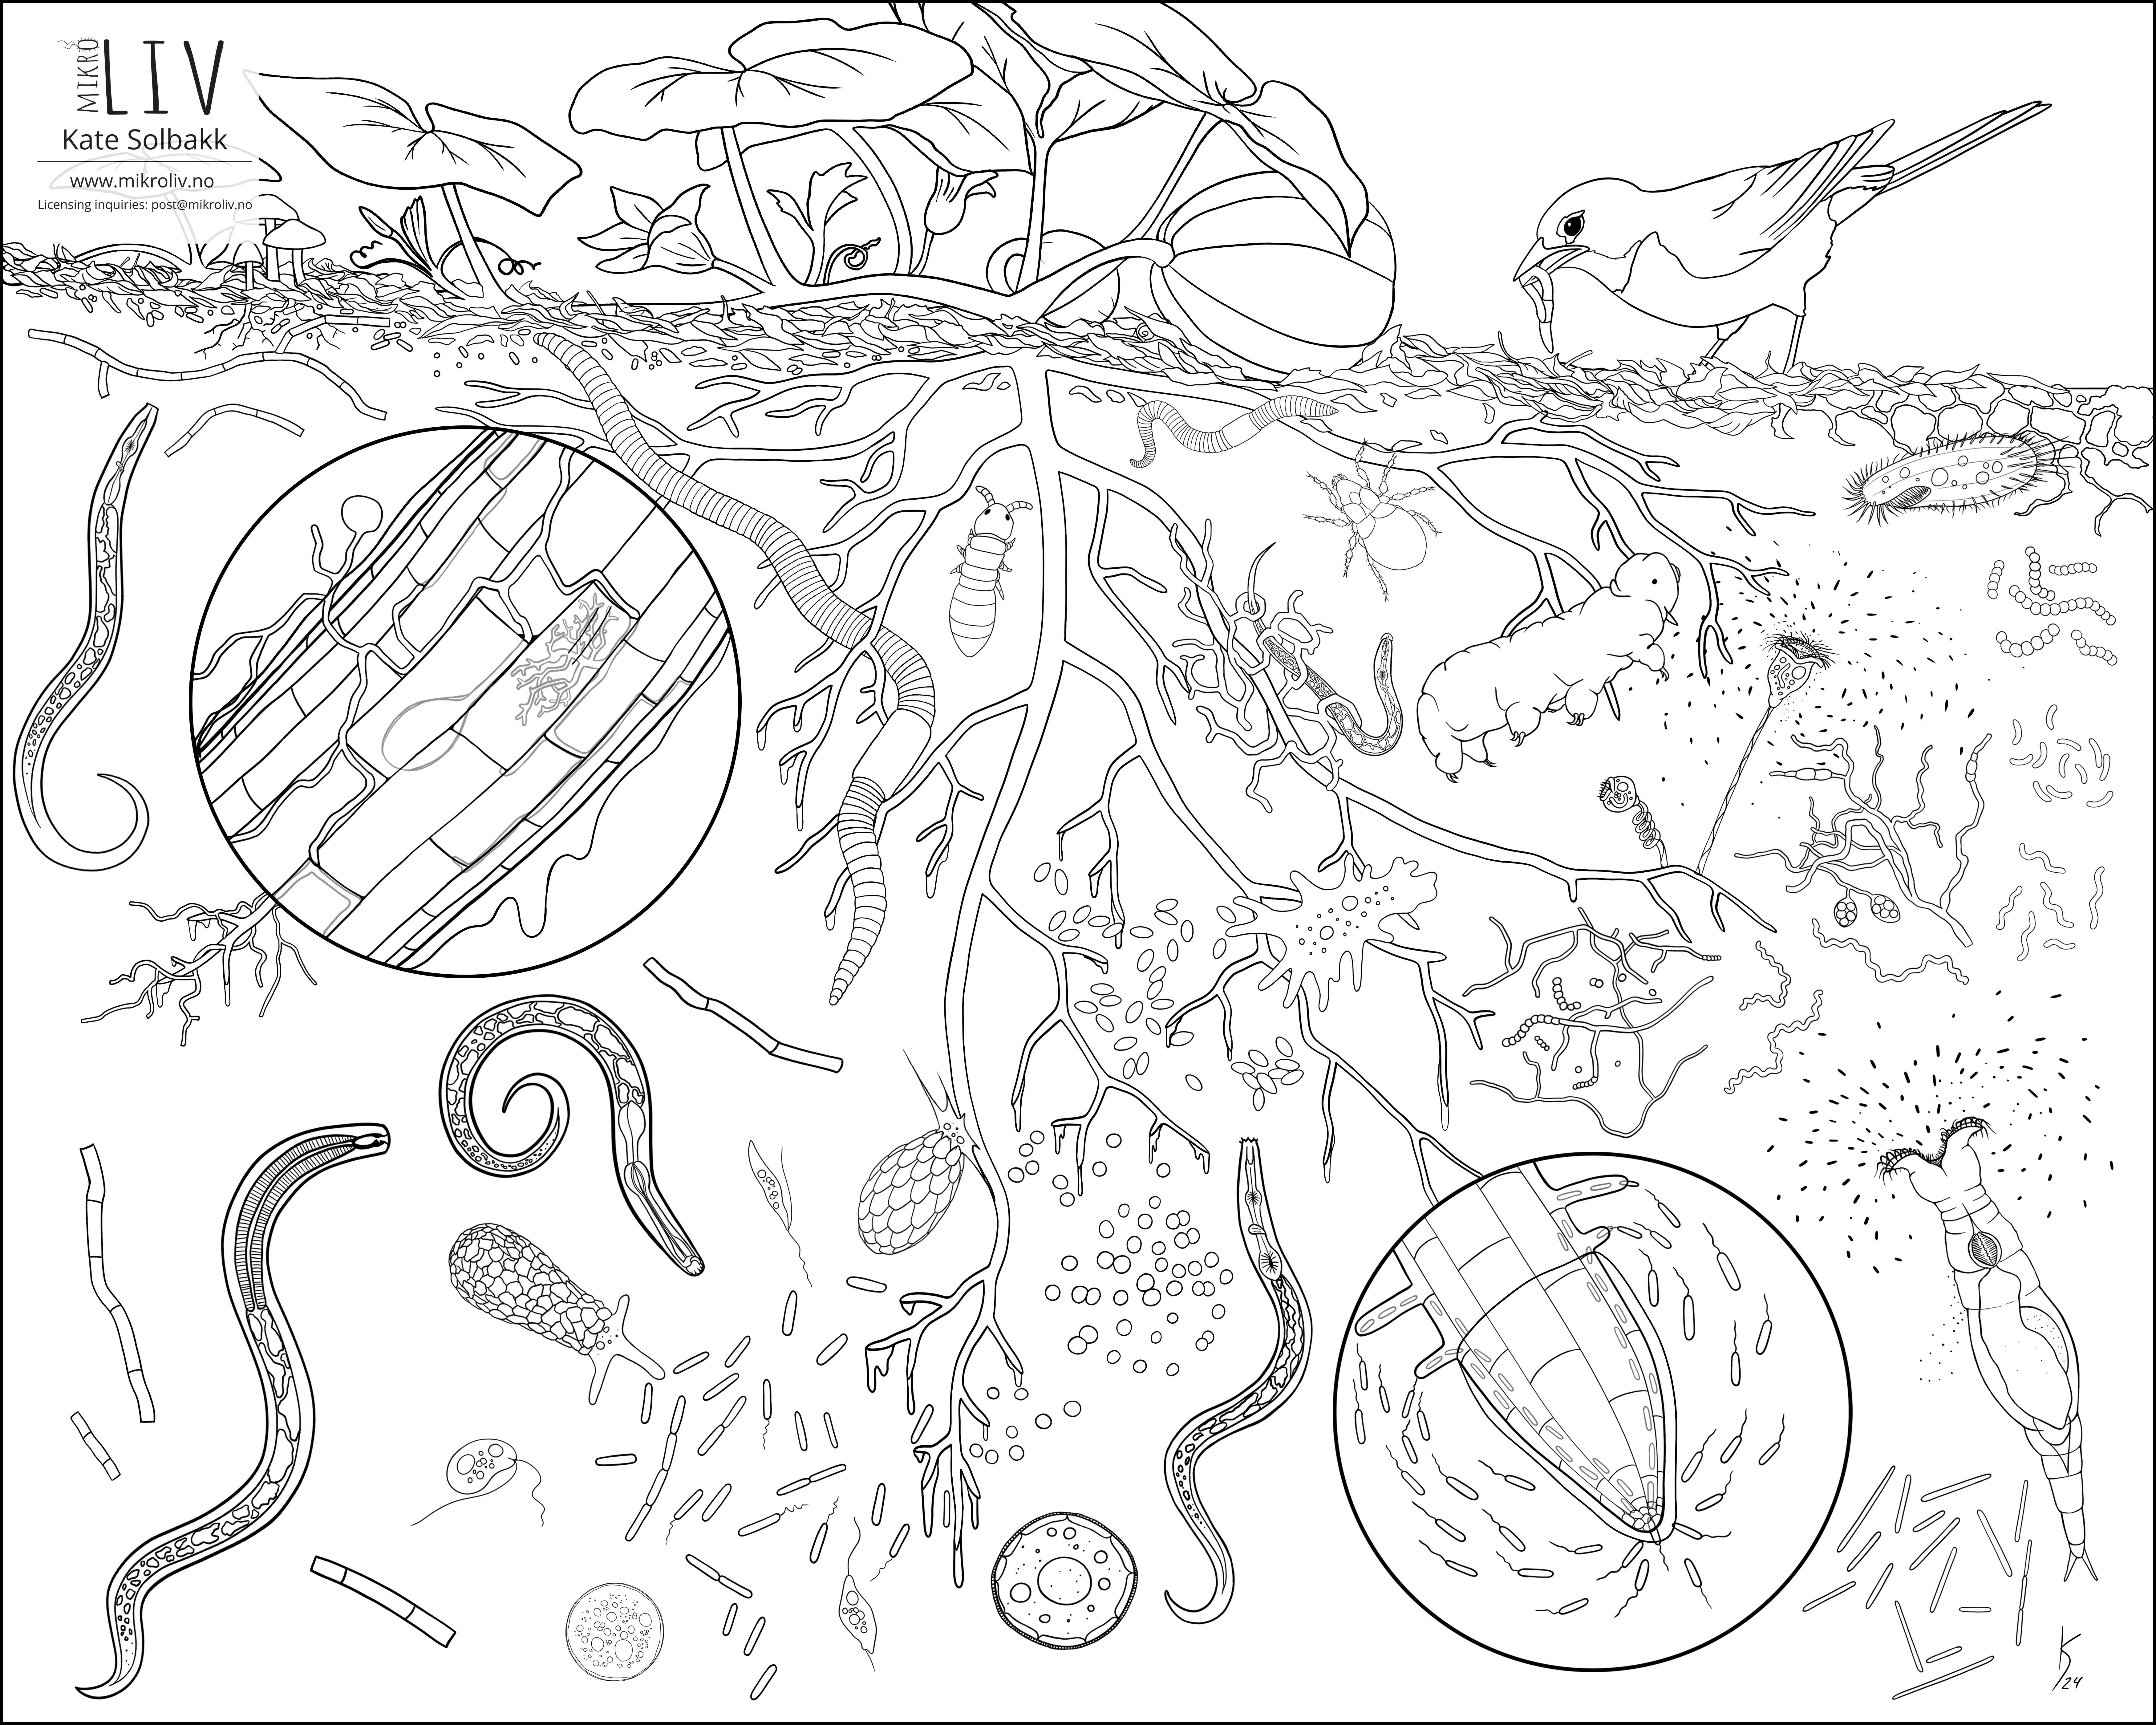
Colouring Page
The next step after finishing the main drawing was to make it into a colouring page. Even though I put all the colours on separate layers, it wasn’t quite as simple as just hiding them.
Here, for example, there is a pile of overlapping lines that are hidden by colour in the main image:

I wasn’t exactly sure how to handle this at first. In the past I might have just started erasing lines, but years of experience have taught me to stay mindful and tread carefully at this stage of a project or suffer the consequences. The easiest or fastest way to do something is usually the most dangerous. This is no time for shortcuts!
First I tried copying the line art into a separate, merged layer and carefully erasing unwanted lines, using the coloured image as reference. This kind of worked, but it was very slow and difficult to do neatly. The lines started looking uneven and less clean overall. I needed to edit the layers separately after all.
Digital drawing is generally more forgiving than physical materials, but you can still easily destroy your work permanently if you’re not careful. I saved a new version of the main file to avoid messing with anything in the original.
I decided to use the masking tool to hide unwanted lines instead of erasing them. This is called “non-destructive editing”, because it’s completely reversible without the limits of the undo button. This tool can still complicate things in some ways, but in this case it was the ideal solution.
Here’s how it turned out:
Layered Presentation Series
The final step of this project was to create a series of exports with parts of the drawing being added in stages. The goal here was to make something that Amy and Andrea can use in presentations to explain the different parts of the soil food web piece by piece. Presenting the drawing in stages should make it easier for participants to follow along without being overloaded by seeing everything all at once.
They gave me a list of which parts should be on which layer, and we ended up with a series of 11 images, starting with only the background, plant, organic matter, and exudates (the liquid dripping from the roots), and working up to the complete picture with everything in it. For presentations, they’ll be able to stack these images on top of one another and use the slide animation tool so they can click to reveal them one by one.
Here’s a short video to demonstrate how this will look:
Expanded Comfort Zone
Commissions often lead me to work in ways I normally wouldn’t if I had the choice. Not necessarily because I don’t want to do those things; I’ve been wanting to do more simple style drawings for years now, but because this type of drawing was outside my comfort zone.
There were times I was frustrated and not sure if I could even do it, but somewhere in the back of my mind I must have known it was doable, otherwise I would not have agreed to the project to begin with. The extra pressure (good pressure) of having other people involved provided the driving force and motivation I needed to overcome challenges I probably would have abandoned otherwise.
Now that the project is finished, I’m incredibly proud of what we created. I’ve gained a stronger sense of confidence and motivation, and my comfort zone is just a little bigger.
I’m so grateful to have opportunities like this to work with wonderful people and accomplish things I never would have by myself.
New Gallery Page

This project was a boost for my portfolio too! I now have enough line art to add a whole new section to the gallery on my website. I’ve been wanting to create more of these types of drawings for ages, because I know they have a lot of potential for practical use. However, there are so many possible things to draw that I would get paralyzed trying to decide where to start and never managed to just sit down and start making them. I guess I needed someone to give me a list, and it finally happened!
I want to add more to this collection, and would love to hear your suggestions for what else to include.
What’s Next
This has been a busy year for commissions, however I haven’t been able to share all of the new artwork from those yet, so stay tuned for updates on those.
I am currently open for new projects, so let me know if you have an idea you’d like to explore!
In the meantime, I’m working on a personal project that was inspired by this one. It’s a detailed full colour illustration of the soil food web in my usual style, but from a new perspective I haven’t tried before. It’s also going to be much more comprehensive than previous ones. I’m really excited about it and can’t wait to share it with you when it’s ready.
In other news, I finally learned how to see and take pictures of the northern lights! They don’t often reach this far south, but we’ve been seeing them much more often lately.
I was initially somewhat disappointed to learn that the beautiful colours only really show up in pictures with long exposure. The camera reveals an impressive light show where the naked eye only sees a dim, slightly shimmering glow. I always thought I was just unlucky and hadn’t seen a really good one yet, but then after a tip from a friend I tried night mode with my phone on a tripod and there they were!
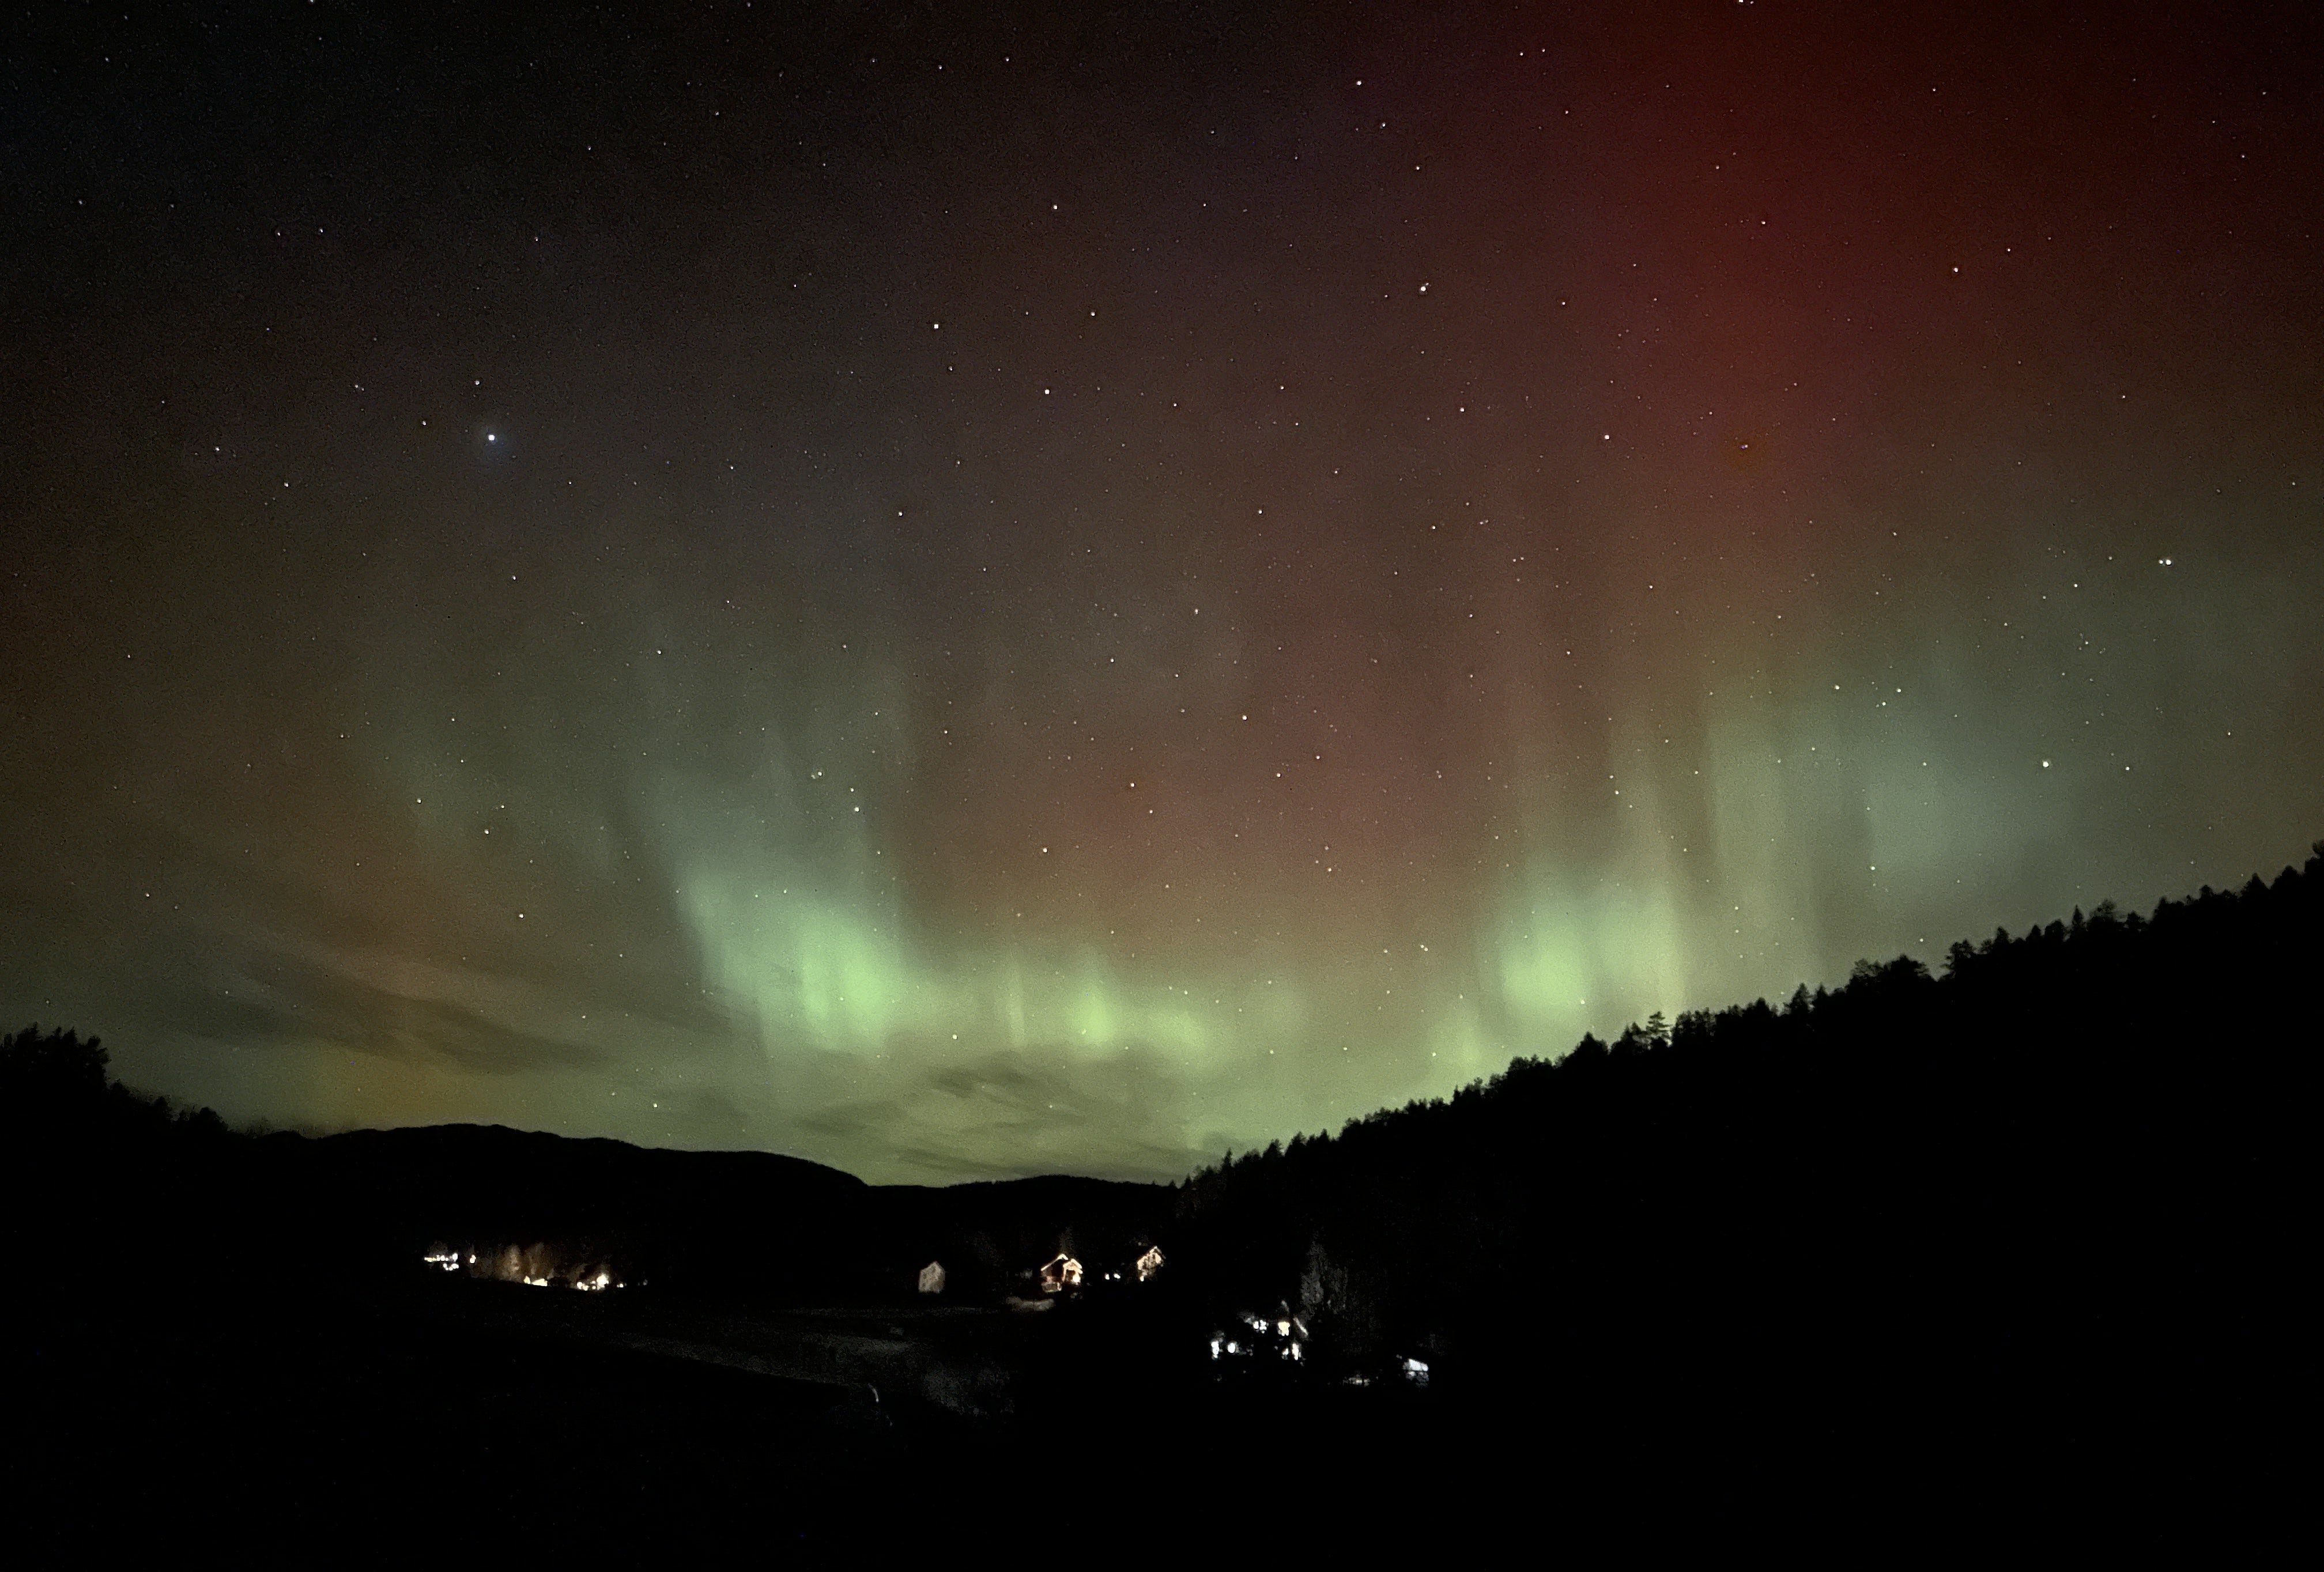
While this can sort of feel like a let down, it doesn’t have to be. We also need special tools and sometimes even imagination to witness the world of microbes, and that doesn’t take anything away from how amazing and beautiful it is.
That’s all for now! Thanks so much for being here and for all your support.
Best wishes,
Kate
Is there a key that goes with the coloring page? I wasn’t sure if everything in the picture was listed on your site. The 6th grade teacher I work with would love this coloring page for her soil unit but some of the organisms may be unfamiliar to her students. Thank you.