


Preparing for Markens Grøde 2024
Microscopes and artwork will be on display! Here's a little peek behind the scenes.

Hi everyone!
Next month there will be a huge annual agricultural fair in Rakkestad, in eastern Norway, called Markens Grøde. According to their website the event can bring in a crowd of 15 000! I’ve been given the opportunity to set up a stand along with a former colleague, where we will introduce visitors to the wonders of microscopic life in soil. I can’t wait to hear some good ‘wow!’s and especially ‘oiiiii!’s!
I’m not sure if I’ve been to an event quite this big before, but I have plenty of experience preparing and hosting stands like this with different kinds of events over the last ten years, and I have to say it feels really good to finally be at the point where this sort of thing is no longer terrifying.
I know it will be a lot of work and a demanding couple of days, but I’ve had enough practice now that I know what I need to do, and I have most of the equipment and supplies on hand. So now it’s less figuring out and more following procedures, which is very nice. I thought it would be fun to share a little about what goes on behind the scenes.
The Goal
Events like this tend to be very busy and chaotic. It’s an opportunity to briefly introduce guests to the idea of soil life and inspire curiosity about it, but it’s usually not a good setting to deliver any real education. The goal is simply to inspire and open their minds to the beauty and complexity of soil life, so they might feel open to learning more about it going forward. My job is to reveal a door they didn’t know was there, and open it for them.
Visitors will typically spend only a few seconds or a couple of minutes at the microscope before moving on. They may be too shy to touch the microscope and search around, or ask questions (if we’re not busy talking to someone already). The artwork helps catch their attention and slow them down a little, which is why I started making it in the first place, but we want them to see the living microbes for themselves too.
A normal, healthy soil sample is full of life, but seeing that it’s full of life requires time, skill, and experience at the microscope. Most visitors to our stand will have none of those things, so all they’ll see is some nondescript, mostly blurry brown clumps and maybe a few moving blobs here and there, if they stay long enough to notice even those.
Samples with lots of movement, especially with large flagellates, ciliates, and rotifers, are by far the most likely to capture a visitor’s attention enough that they actually sit down and take a closer look. So I like to “boost” samples by feeding them with some “bacteria soup” (a mixture of ground lupin seeds and water) or even just a few grass clippings. This adds a bunch more nutrients and bacteria to the mix, which drastically increases the populations of protozoa while maintaining a similar level of diversity.
So I start with a good sample and boost it, and this is how we get those wonderful ‘wow!’s and ‘oiiiii!’s, and to see the wonder and joy that comes from discovering something completely new about the world. That joy of discovery is especially powerful in adults, since we experience it less often with every passing year.
The most rewarding part of these events for me is always the look of surprise on a person’s face as they suddenly realize there is still this much they didn’t know about the world around them. And not just details, but fundamental systems, whole categories of life. I can almost hear them thinking “Okay, maybe I haven’t seen it all yet.”
This is why I do what I do.
Living Seedling Slides
I usually start preparing samples about 2-3 weeks before the event. My approach to this has simplified quite a lot in the last few years. I used to spend a great deal of time preparing many different samples to ensure we had something good to show visitors. I gradually refined my process, so instead of preparing ten or more samples I could just make 2-4.
Then a few years ago I discovered that tiny seedlings can not only survive, but actually grow on microscope slides! Some seedlings are just the right size so that their little roots are visible to the naked eye, but still small enough to view clearly in the microscope. It’s possible to locate a particular area of the root, like the tip or a branch, and then find that same spot in the microscope.
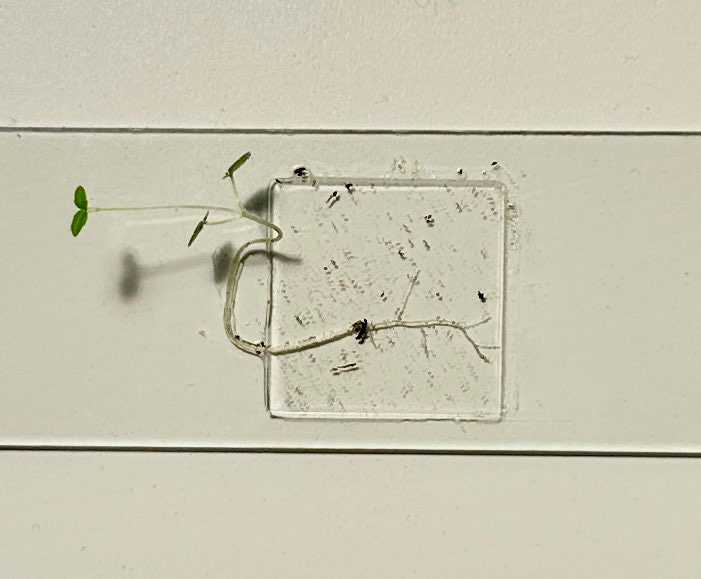
The view in the microscope is upside down and backwards, but we can still identify a distinct region on the slide and find it in the microscope. It’s easiest to start with a lower magnification.
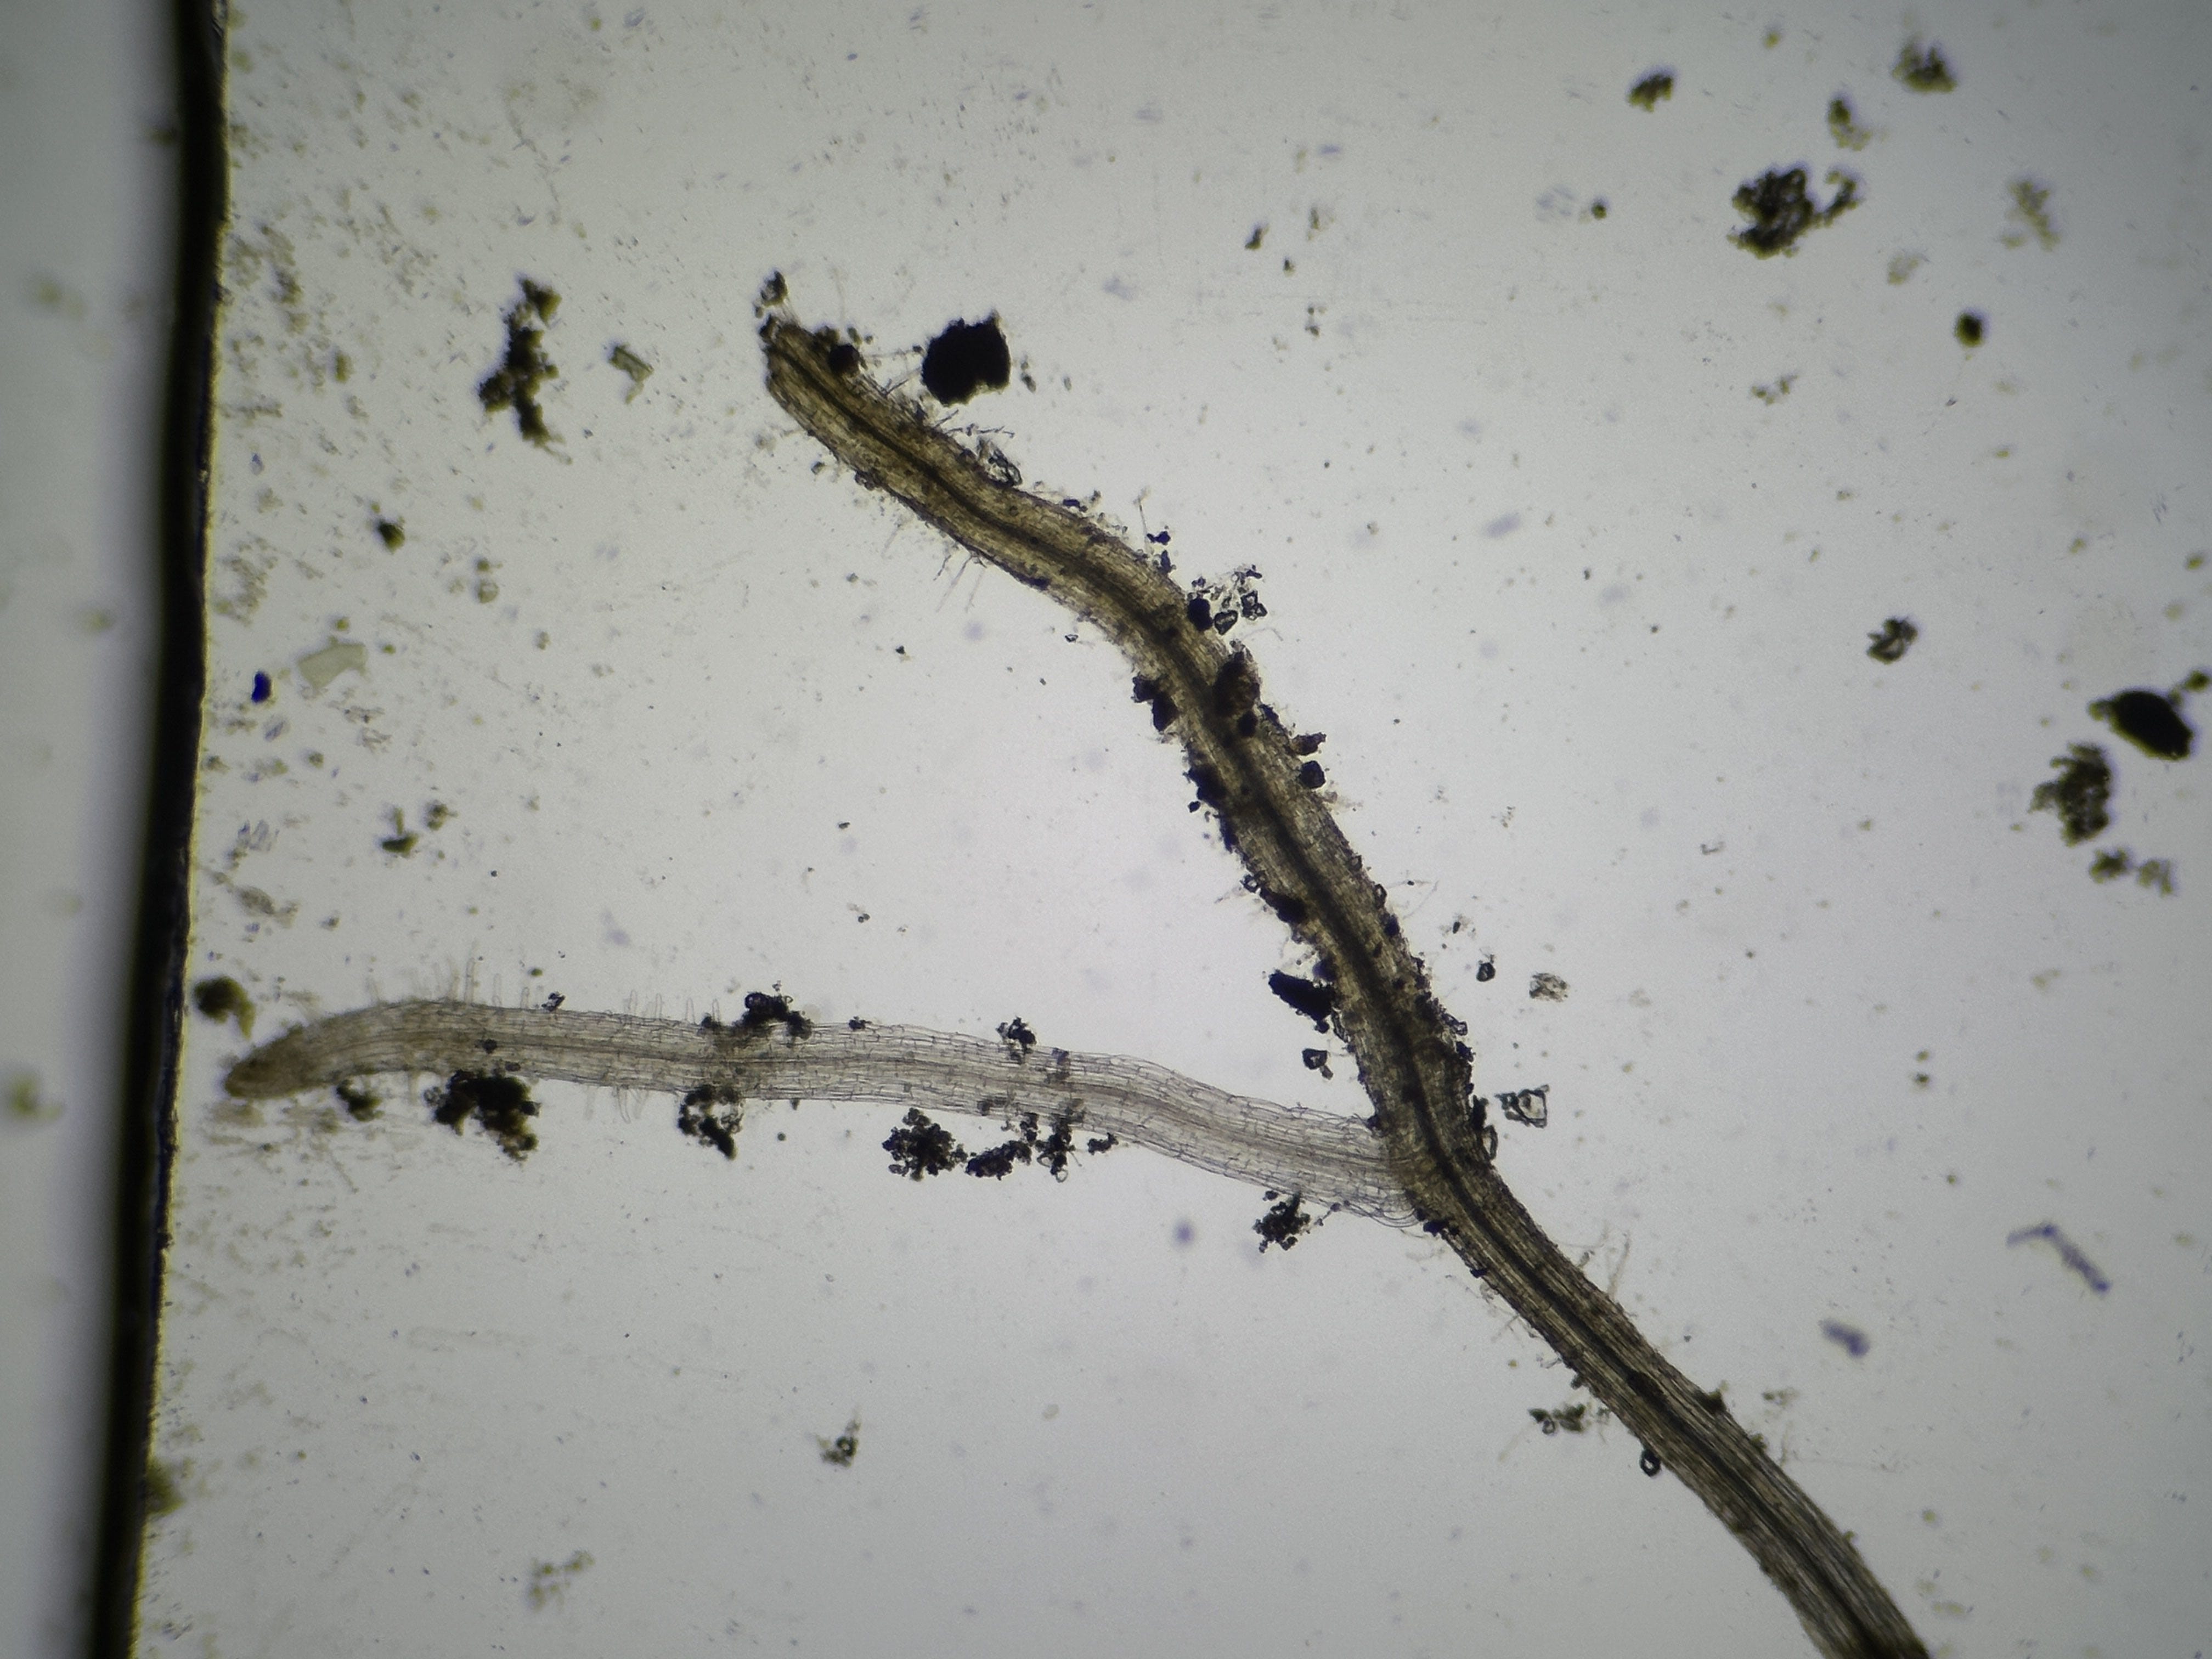
Here is the very tip of the root where it’s almost at the edge of the slide, at 40x magnification, which is the lowest setting on my microscope. The strong dark line on the left side is the edge of the square glass cover that sits on top of the root. Look back at the seedling photo and find that Y-shaped section of the root on the right side.
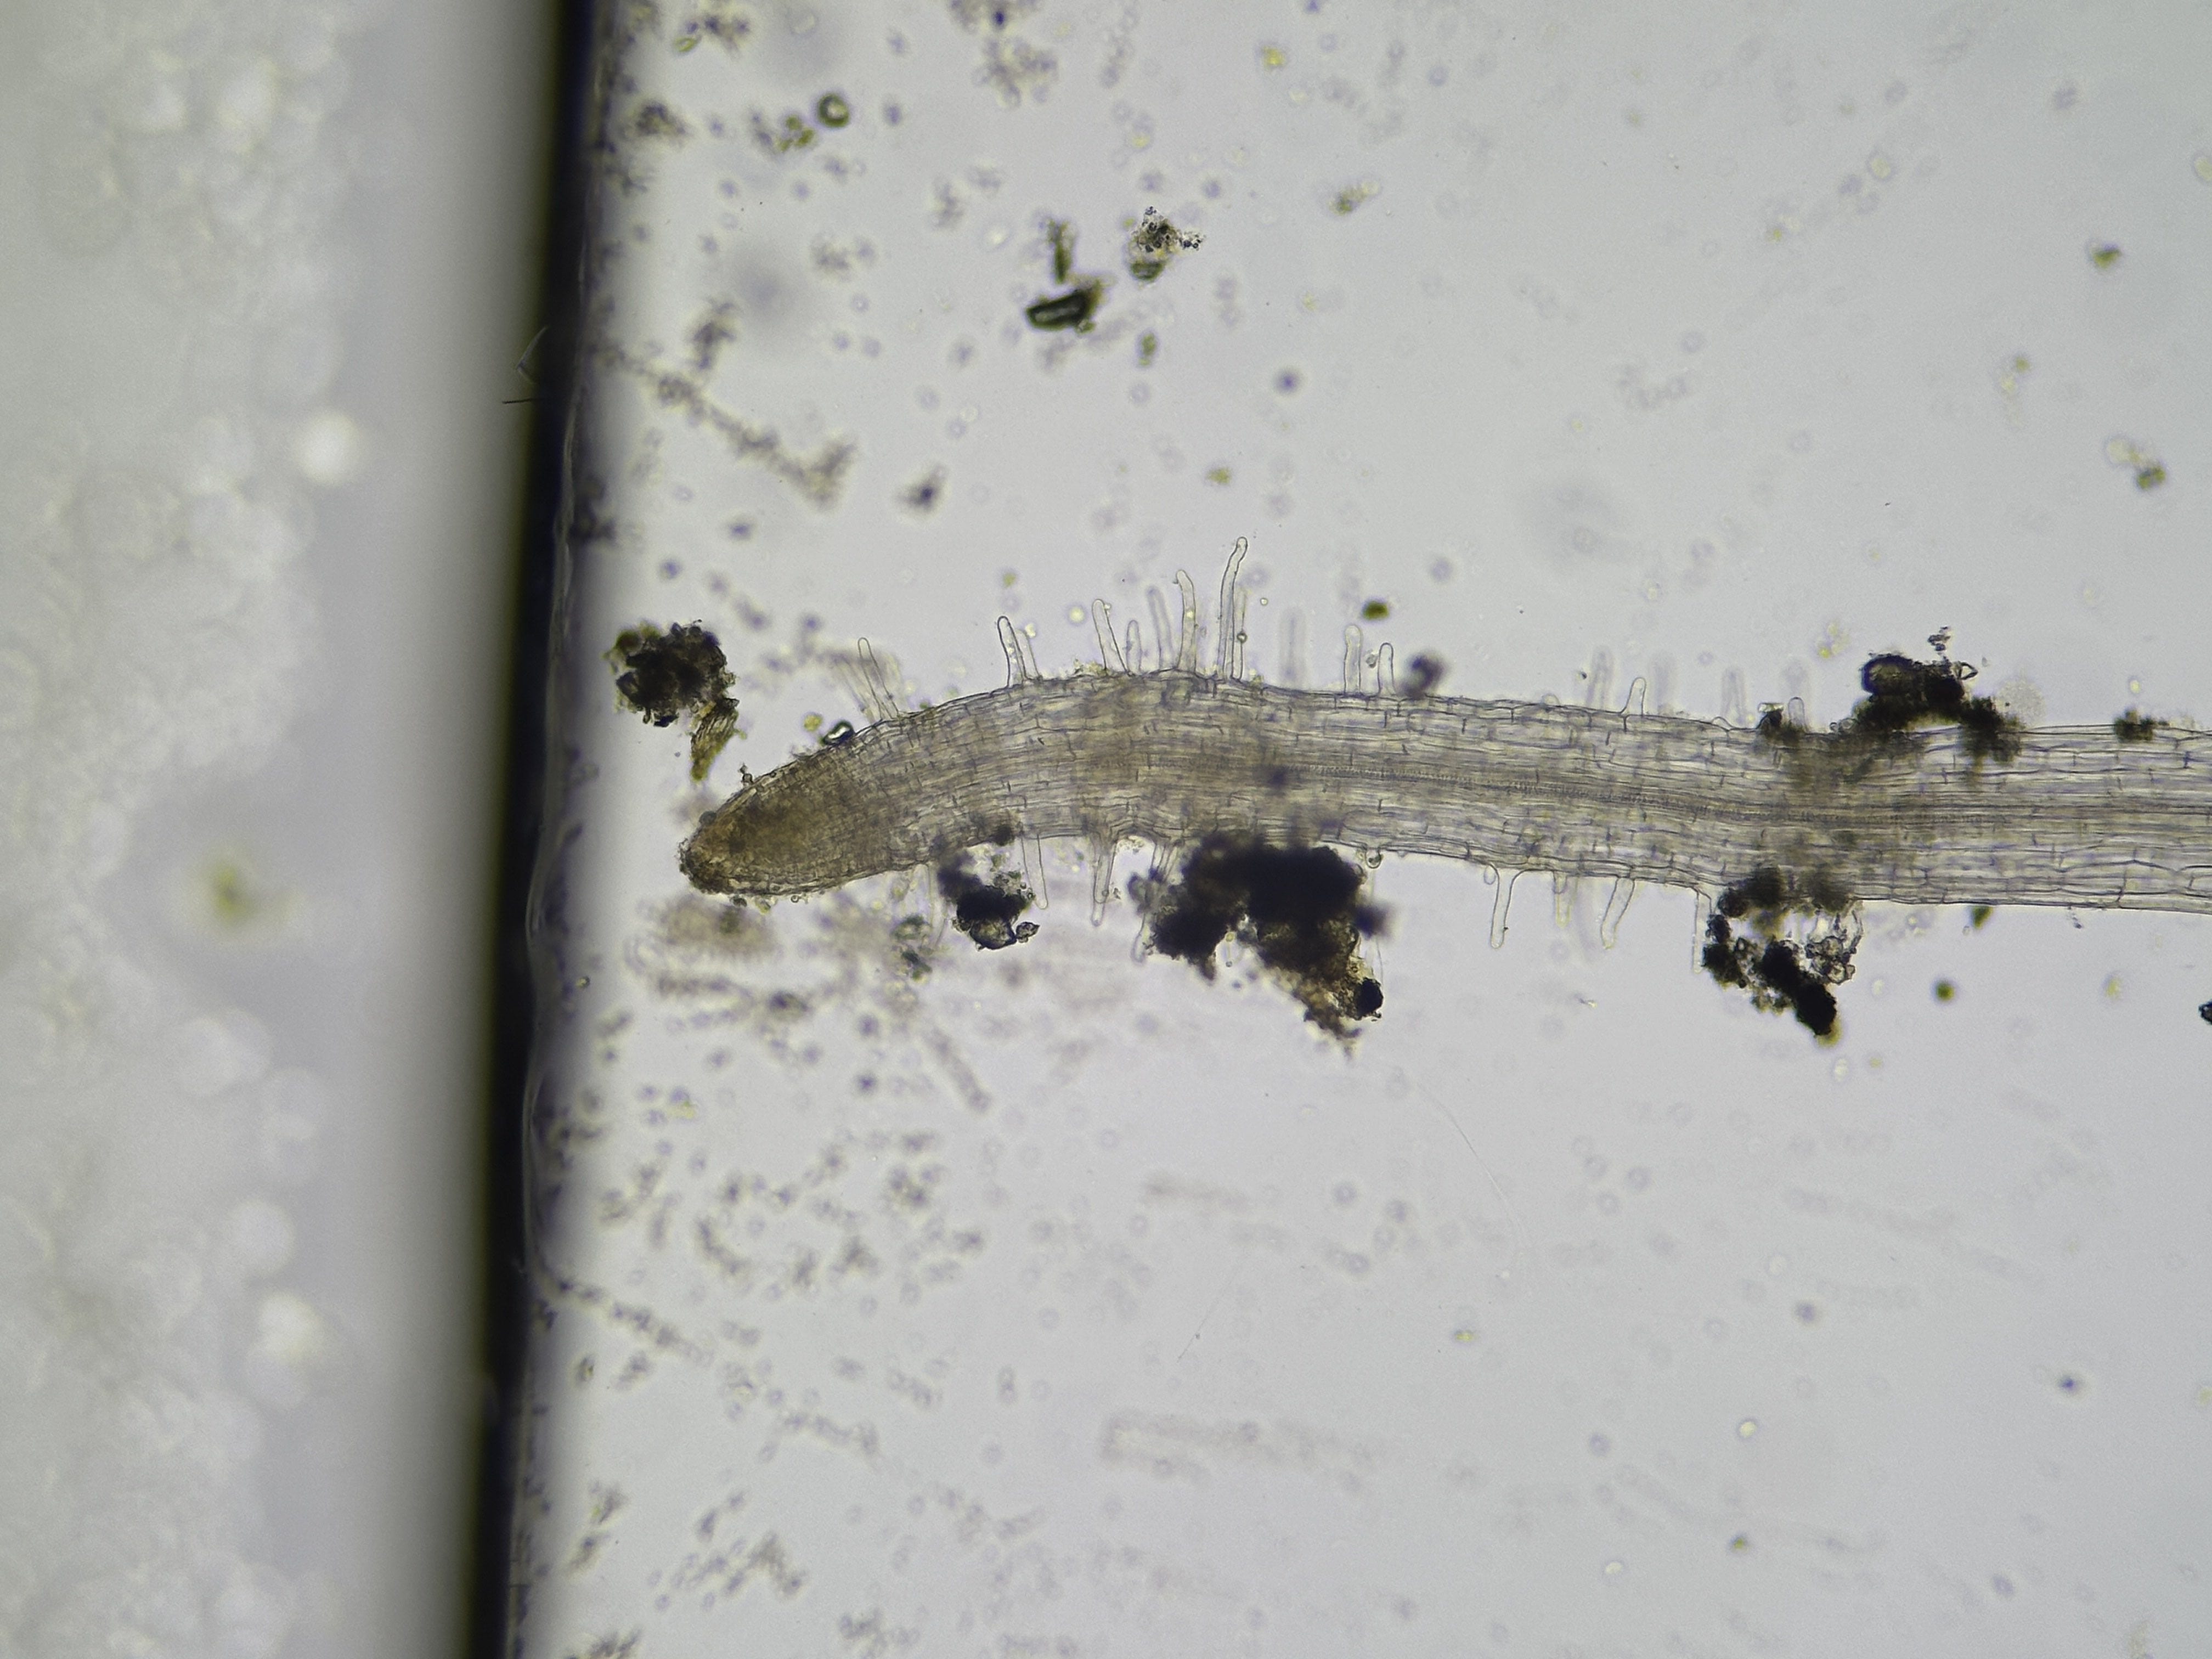
Going up to 100x magnification on the same spot, we can now see root hairs much more clearly, and it will be easier to spot moving protozoa and micro-animals like nematodes and rotifers, if present.
Zooming in one last time, we reach 400x magnification, where we can see protozoa in much more detail, and now we can see bacteria too.

I really love using this to demonstrate the scale and context of what we see in the microscope and make it more tangible. Very often, people are completely shocked when they go back to look at the root again and realize that they can actually see the thing they saw in the microscope (the piece of root) with their own eyes too. It really helps make sense of the microscope view. It also helps them understand that the utterly vast world of microbes really is right there, all around us. It’s not just an idea or a theory, it’s actually true.
One of my favourite “aha!” moments was when a workshop participant asked why everything was occasionally shaking in the microscope, as if there was an earthquake. I explained that the table wasn’t super sturdy, and it was vibration from people bumping it or just walking by. She looked in the microscope and tapped on the table, and then looked back at me, stunned. She said she had never actually considered that our physical movement would have an effect on microbes. Since they are invisible to us, it can feel like microbes are just a concept, or that they exist in some other dimension, but of course we are all here together in the same place at the same time.
Microbe Video
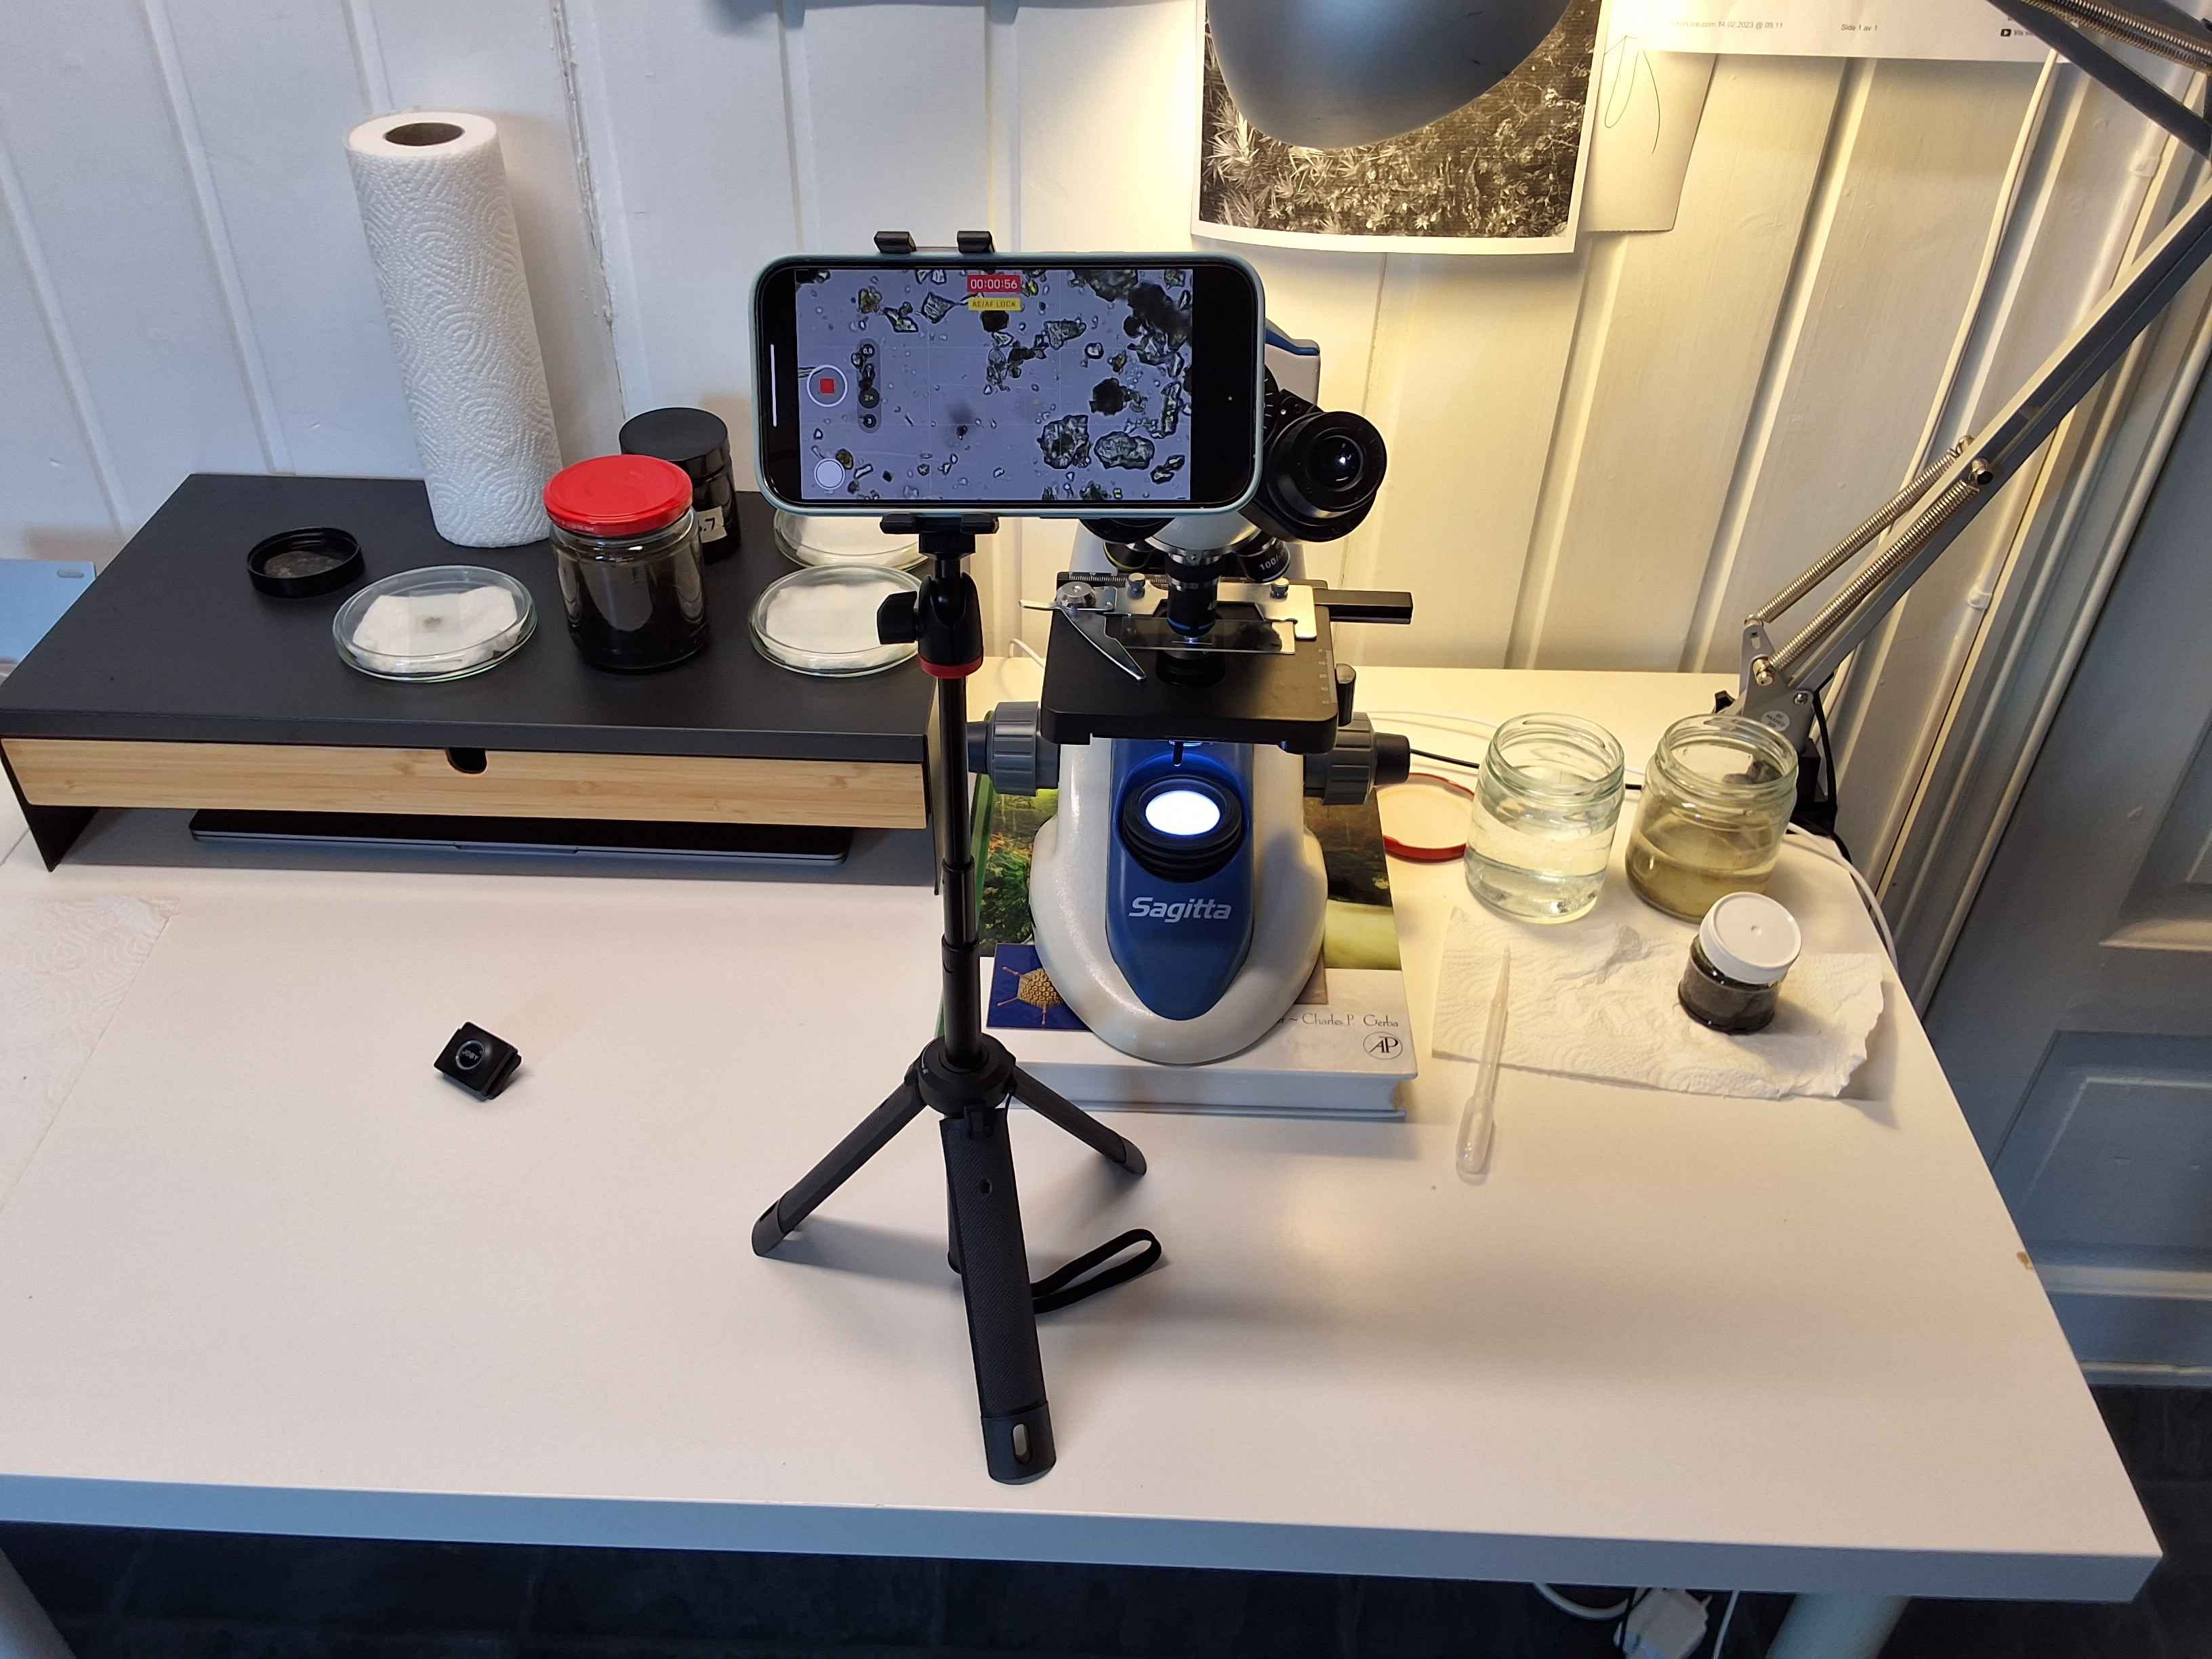
In addition to the microscopes with living roots on display, we plan to have a video playing on a screen nearby, showing various microorganisms that can be found in soil. I have made a video like this before, but that was many years ago and I can do a lot better now. So I’ve been busy collecting samples and recording in the microscope over the last couple of weeks.
I’m super excited about this project! I’m planning to put the video on YouTube and of course I’ll share a post about it with a link here when it’s done.
Here’s a clip from the video of a flagellate zooming around the shells of what I believe to be a testate amoeba dividing. The way the flagellate goes in and out of focus as it follows the curvature of the balloon-like objects is a great demonstration of the microscope’s narrow depth of field. This is why things always look flat in the microscope!
Artwork Display
I’ve also ordered a few new prints to put on display, replacing some that sold at previous events. I decided to try having the labeled version of the Soil Factory drawing printed on plexiglass. I absolutely love how it turned out!

I’m keeping the protective film on until this event just to keep it extra safe for the trip there, but peeled down the top left corner to get a peek at how it actually looks. I’m SO happy with it!!
I’m now considering if I should transition to more of these as my collection grows. It takes up significantly less space than canvas. I currently have fifteen canvas prints and I drive a 2012 Toyota Yaris hatchback. That little car gets very full with all those prints plus microscopes, tools and supplies and whatever else I may need for multi-day events.
Another benefit of plexiglass is that it doesn’t have thick edges like canvas, so there’s no issue with the outer part of the image being wrapped around the sides and potentially messing up the composition.
I don’t know how durable plexiglass is compared to canvas, but I know I’m always afraid of the canvas prints getting any moisture on them, or being poked, dented, dirty or scratched. I’m guessing the plexiglass can also get scratched, but if it gets smudged or spilled on it will be easy to just wipe it off. I don’t know if it’s fully waterproof, but if so that would make the decision very easy!
So we’ll see, if this holds up really well then I’ll probably start ordering more of my exhibit prints in this format going forward.
Event Info
The event is taking place on August 9-11th, but our microscope display will only be there for the first two days. We’ll be located in the Klimalåven.
Here’s the website if you want to know more about the event: https://mgrode.no/
There is also a section about it in the magazine Næringsliv. Pages 31-36 in 2024 issue Nr. 3.
If you plan to attend, I hope you’ll stop by and say hello to our little friends!
As always thank you so much for being here, and for all your support.
Wish you all the best,
Kate
Really enjoyed this, Kate!! Such insightful considerations on how to spark curiosity within a limited context. Brilliant!